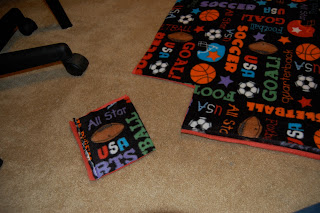
I bought this kit. You don't have to get a kit, you are reading this tutorial! I usually don't buy kits because the fabric is generic, or Disney characters I haven't heard of. This is a plus if you are into that sort of thing I guess. The other plus of a kit is it is usually cheaper then buying the fabric separately, and it comes with everything you need. This might not be true for every fleece fabric, I tend to buy sports team logos which may cost more. I got a kit because I was making this particular one for my cousin's new baby, and I don't know what kinds of boy things she wants to promote, or what teams she or her
If you don't get a kit you need to get a decorative piece of fabric, and a solid piece that complements the colors in the decorative piece. The kit size is 48in by 60in, but you can use math and proportionally size up or down depending on what you need. or do what I do and eyeball the length and width proportion. (This really only works when going down in size.... or I ask M. He is a math teacher after all.)
First thing you want to do is lay the two pieces of fleece out wrong sides together. This can sometimes be hard to tell with fleece, but if there are words on it, you want to be able to read them.
Go to each corner and cut a square out. The size of the square will determine the legnth of your fringe so make sure you are thinking about that. Keep those squares. You might want to make mommy a matching flower for her coat.
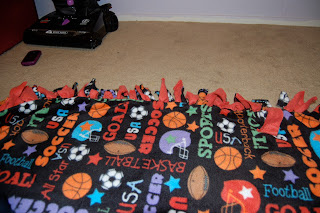
Now go down the edge and cut into the felt every inch, the same depth in that you cut the squares. Pay attention, its easy to get the spacing three inches apart and veer deeper or shallower. then you mean to, and then you will have a lopsided blanket.
Do this until your whole thing is cut up. If you have been working on the floor go stretch.
Now its time to tie. When I tie I like to make the bottom color end up on the top of the tie. That way you see the accent color on the top. You might need to experiment to get it just right, or you might not care. I take the bottom strip and send it to the right when I tie. Is that confusing? Oh well, you'll figure it out. Tie it twice.
Once you have one side done you might notice that it is bunching up a little, especially on the sides. gently stretch it a little. This will make it easier to do the other sides.
Now you are done! Yay! isn't it cute? No?
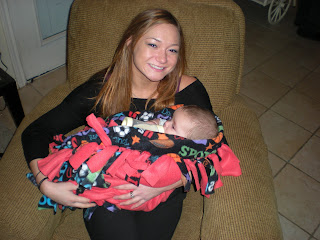
How about now? Dom loves his quilt, or he loves when his Aunt Mah feeds him.
Elliot thought his was a wrapping for his real gift. He'll thank me when it's cold out.
Hope this helps you make someone warm and happy too!
Until next time.


No comments:
Post a Comment